Nummax interactive kiosks can be used to broadcast marketing content, browse the Internet or display an interactive application specially designed for its screen format (HD or 4K).
There are various tools for prototyping an application. These tools allow you to create the whole visual of an application while integrating interactivity.
Whether you are a developer, a graphic designer, a UI / UX specialist or a marketer, the goal of creating a mock-up of an application that simulates the functionalities is to test a real relationship with the user.
This temporary application, shared with your collaborators, allows you to adjust certain features but ultimately to submit the whole to your client.
It is entirely possible to push the situation into real conditions by publishing your application in a Nummax interactive kiosk.
Here are the steps of a concrete method that opens up many possibilities.
Create your prototype with Adobe XD
![]()
For all Adobe suite users, XD software is quick and easy to master. For those who are not familiar with this program, here is the link to Adobe’s training content:
https://www.adobe.com/ca_fr/products/xd/learn/get-started.html
If you are developing an application for an interactive kiosk, build each view considering the physical dimension of the kiosk and the users accessibility.
For my example, I present the Nummax product application used by the company during trade shows. This application was developed with Adobe XD and is constantly evolving. Its interactivity is based solely on clicks and changing views.
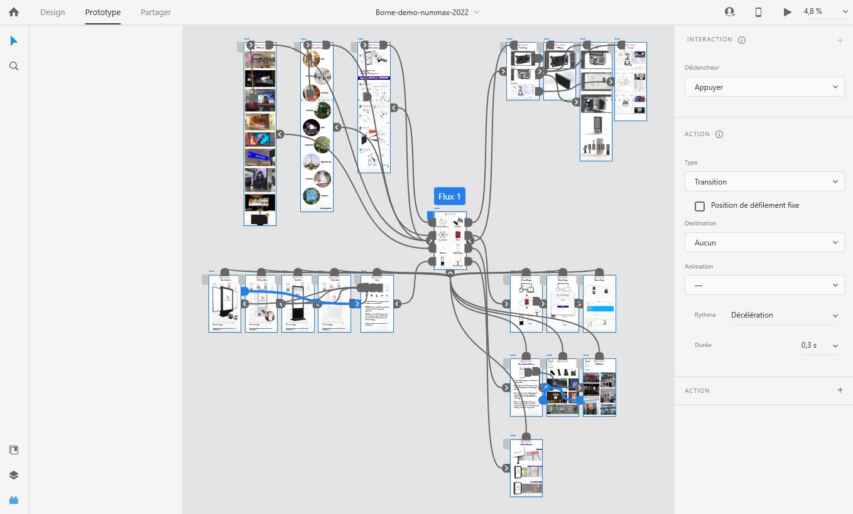
and here is the app simulated in a kiosk image. Go ahead and click in the image!
The Adobe XD software also allows you to make the interactivity sensitive to voice commands. If your kiosk is equipped with a microphone you could adapt the navigation on the kiosk to this feature.
Share your application on a touchscreen device
When your application prototype is ready, click on the “Share” tab and then select the feed (flux) in the main view.
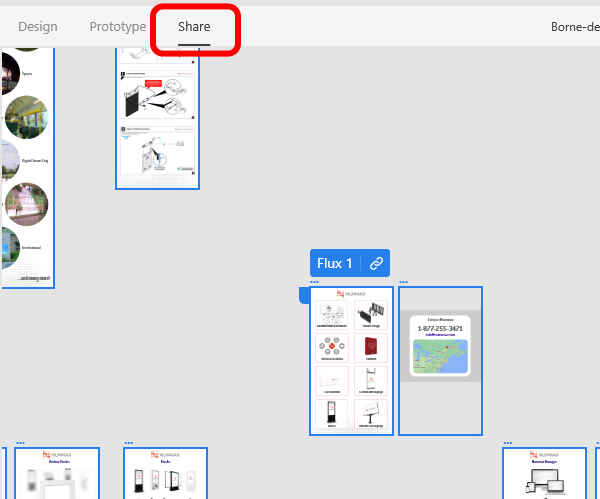
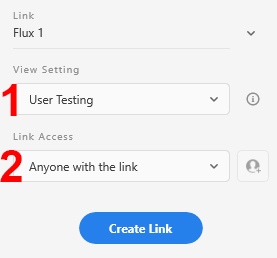
In the right column, make sure your feed is selected (Flux).
1, Choose “User Testing”
2, Choose “Anyone with the link”
then click on “Create link”
Click on the link icon ![]() next the feed or next the URL in the right column to copy the URL in your system notepad.
next the feed or next the URL in the right column to copy the URL in your system notepad.
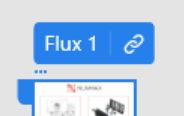
or
![]()
This URL is to be kept to access your prototype application outside of Adobe XD software. Try opening your browser and paste the URL to access it.
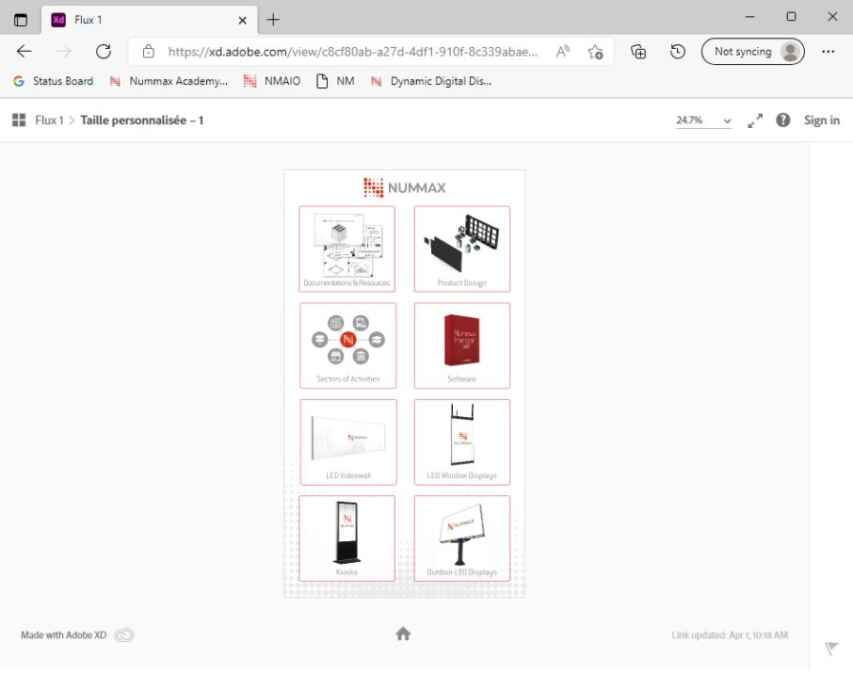
This URL is accessible from the browser of all devices connected to the network because your application is now hosted in Adobe’s cloud servers. You can therefore display it in your Nummax kiosk connected to the network.
Important: If you make any major changes, you will need to update the link. This will not change your URL, but Adobe XD will save your new changes under the existing URL.
How Nummax kiosks work
Interactive kiosks are like any other computer. They require electricity and a network connection (wired or wireless) to be fully functional.
The major elements that make up this equipment are:
- A structure with or without wheels
- An HD or 4K LCD screen
- A touch system (e.g.: Infrared for indoor kiosks)
- A computer with an operating system (Windows or Android)
- Optional: Microphone, motion sensor, camera, speakers
All the systems that make up the kiosk are connected to the main computer (touch system, sensors, microphone, camera,…) which also manages the inetractivity and content broadcasting.
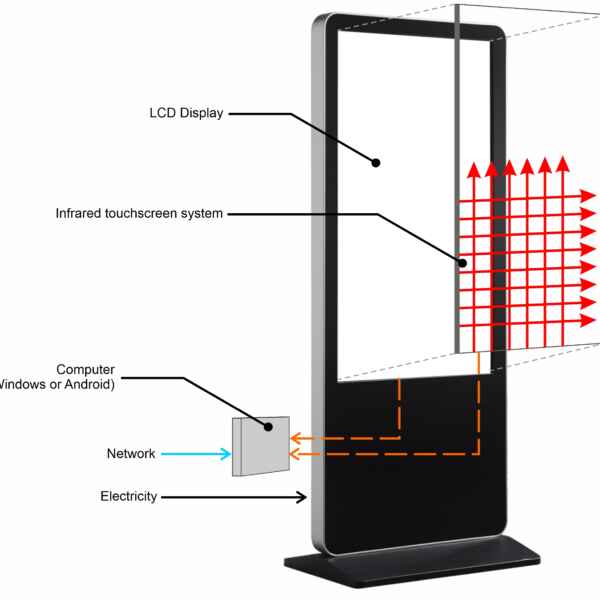
The Windows operating system is installed by default on Nummax touchscreen kiosks, and user-kiosk interactivity is generally done only through the touchscreen.
Method to display your application on the digital interactive kiosk
Nummax uses Nummax Manager software to display your content and even publish web content.
If you have developed a web application (HTML, CSS, JAVASCRIPT), it is possible to publish it locally (saved directly in the kiosk). This process is useful when your kiosk cannot stay connected to the network.
If you have a prototype application developed with Adobe XD or an advanced web application that requires communication with an online database, then the Windows Kiosk mode is recommended.
The Windows Kiosk mode allows you to lock your entire system to a single application. Users cannot use the kiosk for any other purpose than the predefined ones.
Configure the Windows Kiosk mode to exclusively broadcast your application
The Windows Kiosk mode creates a Windows user account that will be locked to the program you choose. In our case, this is the browser with the URL of our application.
Users will have no way to use windows or use the program for anything other than your application.
Here is the procedure to follow:
Go to Windows settings

Click on “Accounts”

Select “Family & other users”

Click on “Set up a kiosk”

Then the button “Get started”

Choose a name (eg: Kiosk Application)
You can choose which program will be used in the kiosk account.
Select Microsoft Edge browser and click “Next”

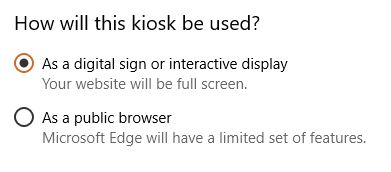
When asked what the kiosk is used for, choose “digital sign or interactive display” as we need the full screen touch system.
The “public browser” mode can also be used if you are broadcasting a public website to block some of the usual browser functions and access.
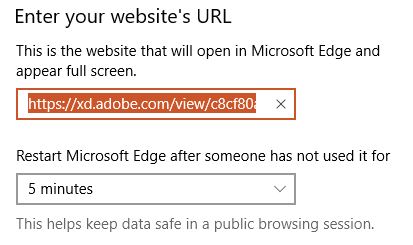
Then in the URL field, paste the full application prototype URL you got from Adobe XD.
You can also set a delay for the URL to be reloaded (return to the home page) if no one touches the touch screen for a while.
This feature is useful to return to the home page if a user has abandoned the navigation anywhere in the application .
By clicking on “next”, you will finish the process. All you have to do is restart Windows to load the application (kiosk mode) in your Nummax interactive kiosk.
Windows will finish configuring the Kiosk mode. This may take a few minutes.
Important: You will not be able to access Windows as before. To deactivate the Kiosk mode, you must connect a keyboard to the kiosk and press Ctrl+Alt+Delete.
The Windows home page will appear and on the left menu you can click on the user account and select your Windows administrator account.
You will then be able to identify yourself and enter Windows as before.
To remove the Kiosk mode, go back to the settings, then in the “Family & other users” accounts, click on “Assigned access”

The kiosk name will be displayed (eg: Kiosk Application)
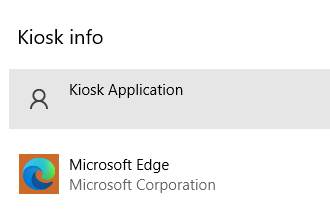
Click on the name and “Remove Kiosk”, then confirm to delete the kiosk mode account

Restart Windows, your system will be back to your usual Windows.
From prototype application to web or Android application
By shaping your interactive application idea with prototyping software like Adobe XD, you can test the user experience. But to take this experience further, with a Nummax interactive kiosk, Windows has a Kiosk mode that isolates the use of your application within the kiosk.
The user can interact only with your interface without being able to navigate elsewhere.
This kiosk mode can also be very useful if you have developed a web application hosted online. With a network access, the user will be able to navigate in a dynamic environment in full screen and benefit from real time data.
The arrival in force of “NoCode” application development platforms on the market now allows anyone to create quality applications without coding (Adalo, Glide, Bravo, Betty Blocks, Bubble, Fliplet, Stage, etc.), but if your final application is developed for the Android operating system, Nummax also offers its kiosks with Android OS.
All these possibilities offer great opportunities for developers, graphic designers and marketers to test their creations in real life on Nummax interactive kiosks.
